
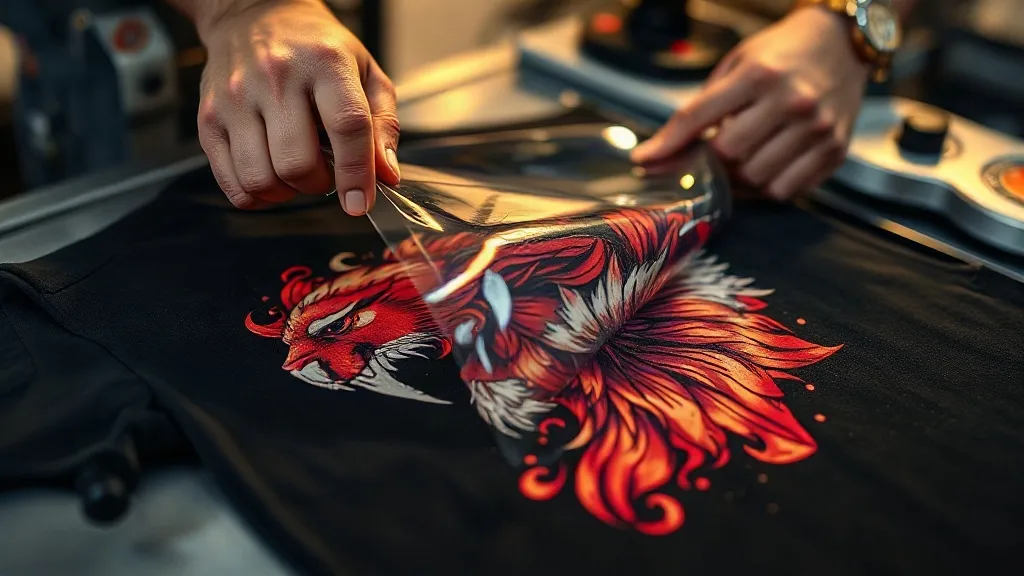
When I first heard about dtf transfers, I was skeptical. As a screen printer with over a decade of experience, I’d seen plenty of “revolutionary” techniques come and go. But after testing DTF on everything from cotton to polyester, I’m convinced: this technology fills a gap that screen printing alone can’t cover. In this guide, I’ll share what I’ve learned about dtf transfers, from choosing the right film to troubleshooting common issues, so you can decide if it’s right for your shop.
What Are DTF Transfers?
DTF stands for Direct to Film. The process involves printing a design onto a special PET film using water-based pigments, then applying a powder adhesive while the ink is still wet. Once cured, the transfer is ready to be heat-pressed onto fabric. Unlike DTG (Direct to Garment), which prints directly onto the shirt, dtf allows you to print on a wide range of materials, including blends and synthetics, without pre-treatment. The result is a soft, stretchable print that holds up wash after wash.
How DTF Compares to Other Printing Methods
Screen printing is king for bulk orders on cotton, but it struggles with complex gradients and photo-realistic images. DTG excels at detail on 100% cotton but requires pre-treatment and can be finicky on dark shirts. DTF, on the other hand, handles intricate designs and works on almost any fabric. It’s also more cost-effective for short runs than screen printing because you don’t need to create screens. The trade-off? DTF prints can feel slightly thicker than screen prints, but advances in film and powder have made them surprisingly soft.
Why DTF Transfers Are Gaining Traction
In my shop, DTF has become a go-to for custom orders that used to be headaches. Here’s why:
- Versatility: Works on cotton, polyester, blends, and even treated nylon. No need to stock different inks or pre-treatments.
- Detail and color: Produces vibrant, high-resolution prints with fine lines and gradients that screen printing can’t match.
- Low minimums: Ideal for one-offs and small batches, making it perfect for personalized items.
- Durability: When applied correctly, DTF prints withstand 50+ washes without fading or cracking.
But don’t take my word for it. Try a sample pack and see for yourself.
Choosing the Right DTF Supplies
Not all DTF films and powders are created equal. I’ve tested several brands, and the differences are stark. Here’s what to look for:
Film
Go for a film with a consistent coating that releases cleanly. Cheap films can cause ink smudging or poor powder adhesion. I prefer films with a matte finish because they’re easier to handle and produce fewer static issues.
Powder
The adhesive powder is crucial for durability. Look for a fine, uniform powder that melts evenly. Coarse powders can leave a gritty texture, while too-fine powders may not provide enough grip. I recommend starting with a mid-grade powder and adjusting based on your environment (humidity affects adhesion).
Inks
Use water-based DTF inks specifically formulated for film. They need to be viscous enough to hold detail but fluid enough to pass through the printhead smoothly. Off-brand inks can clog nozzles and ruin prints.
Step-by-Step DTF Application
Getting a perfect DTF transfer requires attention to detail. Here’s my workflow:
- Print: Load the film into your printer (a modified inkjet or dedicated DTF printer) and print your design. Ensure the image is mirrored if you’re using a heat press.
- Powder: While the ink is wet, sprinkle the adhesive powder evenly over the design. Shake off excess and return it to the container.
- Cure: Place the film in a curing oven or under a heat gun until the powder melts and the ink is dry. The surface should look glossy, not matte.
- Press: Set your heat press to 325°F (160°C) with medium pressure. Pre-press the garment for 5 seconds to remove moisture. Place the transfer on the fabric, cover with a Teflon sheet, and press for 15-20 seconds.
- Peel: Wait until the transfer is cool to the touch (about 10 seconds) before peeling the film. Peeling hot can cause the design to stretch or tear.
Pro tip: Always do a test press on a scrap piece of fabric to dial in your settings.
Troubleshooting Common DTF Issues
Even experienced printers run into problems. Here’s how to fix the most common ones:
Design Peeling After Wash
This usually means insufficient pressure or time during pressing. Increase pressure and ensure the powder is fully melted. Also, check that the fabric is pre-pressed to remove wrinkles and moisture.
Faded or Dull Colors
Could be due to low curing temperature or expired ink. Make sure your curing oven reaches the correct temperature (typically 320-330°F) and that inks are fresh. Also, store film in a cool, dry place.
Sticky Residue on Film
If the film feels tacky after curing, the powder hasn’t melted completely. Increase curing time or temperature. Conversely, if the powder turns yellow, you’ve overcured it.
DTF vs. Screen Printing: When to Choose Which
I use both daily, and here’s my rule of thumb: for large orders (50+ pieces) with simple designs on cotton, screen printing is more economical. For detailed, multi-color designs or orders on synthetic fabrics, DTF wins. It’s also my go-to for rush jobs because there’s no screen setup. That said, DTF has a higher per-unit cost for large runs, so factor that in.
Frequently Asked Questions
How durable are DTF transfers?
When applied correctly, DTF transfers can last as long as the garment. I’ve seen prints survive over 50 washes with minimal fading. The key is proper curing and pressing.
Can I use DTF on 100% polyester?
Yes, DTF works beautifully on polyester, including sublimation-friendly fabrics. Just be mindful of heat settings to avoid scorching.
Do I need a special printer for DTF?
You can convert an inkjet printer (like an Epson) with DTF ink and film, but dedicated DTF printers offer better reliability and speed. Start with a conversion kit if you’re testing the waters.
How do I store DTF transfers?
Keep them in a cool, dry place away from direct sunlight. Stack them with the film side down to prevent scratches. Properly stored transfers remain usable for months.
What’s the best way to remove a DTF transfer?
If you need to remove a transfer, reheat the garment and peel it off while warm. Use a heat gun or iron to loosen the adhesive.
DTF transfers have earned a permanent spot in my shop, and I encourage you to give them a try. With the right supplies and a bit of practice, you’ll unlock new possibilities for custom apparel. For high-quality DTF transfers and supplies, check out Custom Premium Shirt.